IN THIS ARTICLE
Most home theatre guides focus on the screen, speakers, and seating. The electrical and wiring work usually gets one paragraph. That’s backwards — the wiring decisions you make at the start determine what’s possible later, and undoing poor wiring is expensive.
Here’s what the electrical side of a home theatre installation actually involves.
Dedicated circuits and power
A home theatre draws significant power — a large screen, amplifier, subwoofer, streaming devices, and gaming consoles running simultaneously can easily exceed what a standard circuit was designed for.
A dedicated circuit from your switchboard to the theatre room gives you clean, stable power without interference from other appliances, and avoids nuisance tripping when multiple high-draw devices share a circuit.
For a proper setup, an electrician should install:
- A dedicated 20A or 32A circuit for the AV equipment
- Multiple double power points positioned where equipment will sit
- A separate circuit for lighting, particularly if using dimmable systems
Getting this right during the build or renovation is straightforward. Retrofitting it after walls are closed is significantly more expensive.
In-wall and in-ceiling cabling
Running cables through walls and ceilings needs to happen before linings go on. Once GIB is in place, making changes means cutting into walls.
What typically needs to be run:
Speaker cabling — if you want in-ceiling or in-wall speakers rather than visible cables, the wiring needs to be in before linings. Each speaker location needs cabling run back to where the amplifier will sit.
HDMI and AV cabling — in-wall conduit or pre-installed HDMI cables between the screen location and the AV rack position eliminate visible cables entirely.
Network cabling — a wired ethernet connection to the room provides more reliable streaming than WiFi for 4K content. Worth installing while walls are open.
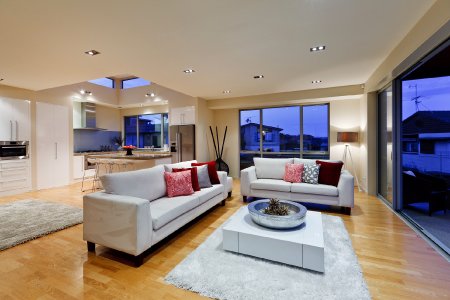
Lighting control
Lighting is one of the most overlooked aspects of a home theatre setup. The right lighting system makes a genuine difference to the viewing experience — and doing it properly is electrical work.
Options range from simple dimmer switches through to full scene control that adjusts multiple lighting zones at once. In-wall dimmable LED strips, recessed dimmable downlights, and independently controlled cove lighting are all popular in Auckland home theatre builds.
Key point: if you want dimmable LEDs, the dimmer switch needs to be compatible with the LED fittings. Your electrician should spec this together.
What does home theatre electrical work cost in Auckland?
| Scope | Typical cost range |
|---|---|
| Dedicated circuit and additional power points | $400 – $900 |
| In-wall speaker and AV cabling (per room) | $600 – $1,500 |
| Lighting upgrade with dimmers | $300 – $800 |
| Full electrical scope (new build or renovation) | $1,500 – $3,500 |
These costs assume reasonable access. Retrofitting in an existing room with closed walls adds time and patching costs.
Common questions
Do I need an electrician for home theatre installation?
For the AV equipment itself — no, that’s plug-and-play. For any fixed wiring, dedicated circuits, in-wall cabling, or lighting — yes, a licensed electrician is required.
When should I get the electrician in?
During a renovation or new build, before linings go on. For an existing room, discuss access requirements with your electrician during the quoting visit.
Can you install the full system — AV equipment and all?
We handle all the electrical and cabling work. For AV equipment selection and setup, we can recommend Auckland-based AV specialists we work alongside regularly.
Planning a home theatre in Auckland?